Click here to download source code
Package Name : selva.list
Project Name : ListView3
Version : 1.5 (Support 1.5 and above versions)
main.xml
<?xml version="1.0" encoding="utf-8"?>
<RelativeLayout xmlns:android="http://schemas.android.com/apk/res/android"
android:layout_width="fill_parent"
android:layout_height="fill_parent"
android:orientation="vertical" >
<ScrollView
android:layout_width="fill_parent"
android:layout_height="fill_parent"
android:focusableInTouchMode="true"
android:focusable="true">
<HorizontalScrollView
android:layout_width="fill_parent"
android:layout_height="fill_parent"
android:focusableInTouchMode="true"
android:focusable="true">
<TableLayout
android:id="@+id/table1"
android:layout_width="fill_parent"
android:layout_height="fill_parent"
android:focusableInTouchMode="true"
android:focusable="true">
</TableLayout>
</HorizontalScrollView>
</ScrollView>
</RelativeLayout>
shape.xml
<selector
xmlns:android="http://schemas.android.com/apk/res/android">
<item android:state_pressed="true" >
<shape>
<gradient
android:startColor="#DDA0DD"
android:endColor="#ffff00"
android:angle="270" />
<corners
android:radius="3dp" />
<padding
android:left="10dp"
android:top="10dp"
android:right="10dp"
android:bottom="10dp" />
</shape>
</item>
<item android:state_focused="true" >
<shape>
<gradient
android:endColor="#ff00ff"
android:startColor="#000fff"
android:angle="270" />
<stroke
android:width="3dp"
android:color="#f0f0f0" />
<corners
android:radius="3dp" />
<padding
android:left="10dp"
android:top="10dp"
android:right="10dp"
android:bottom="10dp" />
</shape>
</item>
<item>
<shape>
<gradient
android:endColor="#000000"
android:startColor="#000000"
android:angle="270" />
<stroke
android:width="1dp"
android:color="#000000" />
<corners
android:radius="3dp"
/>
<padding
android:left="1dp"
android:top="1dp"
android:right="1dp"
android:bottom="10dp" />
</shape>
</item>
</selector>
Listview2Activity.java
package selva.list;
import android.app.Activity;
import android.graphics.Color;
import android.os.Bundle;
import android.text.Html;
import android.view.View;
import android.widget.TableLayout;
import android.widget.TableRow;
import android.widget.TextView;
import android.widget.TableRow.LayoutParams;
import android.widget.Toast;
public class Listview2Activity extends Activity
{
// name and age is equal length array
String[] name =
{
"Apple",
"Banana",
"Orange",
"Mango",
"Grapes",
"Jack Fruit",
"Strawberry",
"cucumber",
"pumpkin",
"pine Apple"
};
String[] age =
{
"20",
"21",
"22",
"23",
"24",
"25",
"26",
"27",
"28",
"29"
};
/** Called when the activity is first created. */
@Override
public void onCreate(Bundle savedInstanceState) {
super.onCreate(savedInstanceState);
setContentView(R.layout.main);
TableLayout tv=(TableLayout) findViewById(R.id.table1);
tv.removeAllViewsInLayout();
int Fruits_length=name.length;
int i=0;
while(i<Fruits_length)
{
String str1 = "<font color=#0099ff>Name</font> <br/> <font color=#ffffff> "+name[i]+" </font>";
String str2="<font color=#0099ff>Age</font> <br/> <font color=#ffffff> "+age[i]+" </font>";
final TableRow tr=new TableRow(Listview2Activity.this);
tr.setLayoutParams(new LayoutParams(
LayoutParams.FILL_PARENT,
LayoutParams.WRAP_CONTENT));
tr.setId(i);
final TextView b1=new TextView(Listview2Activity.this);
b1.setTextSize(15);
b1.setText(Html.fromHtml(str1));
b1.setWidth(200);
tr.addView(b1);
final TextView b2=new TextView(Listview2Activity.this);
b2.setTextSize(15);
b2.setText(Html.fromHtml(str2));
b2.setWidth(200);
tr.addView(b2);
tr.setBackgroundDrawable(getResources().getDrawable(R.drawable.shape));
tv.addView(tr);
final View vline1 = new View(Listview2Activity.this);
vline1.setLayoutParams(new TableRow.LayoutParams(TableRow.LayoutParams.FILL_PARENT, 1));
vline1.setBackgroundColor(Color.GREEN);
tv.addView(vline1);
tr.setOnClickListener(new View.OnClickListener() {
@Override
public void onClick(View v) {
String e=String.valueOf(tr.getId());
Toast.makeText(getApplicationContext(), e, Toast.LENGTH_SHORT).show();
}
});
i=i+1;
}
}
}
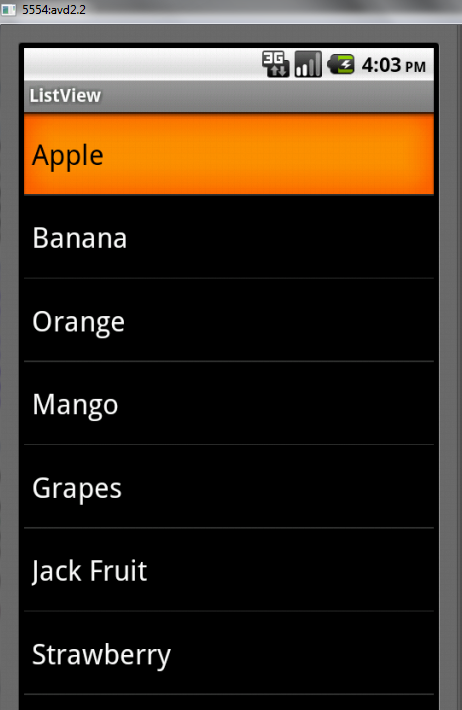
OUTPUT:

click first row. You will be get row number as 0

click fifth row. You will be get row number as 4

Click here to download source code